
You create campaigns in the Nine Ad Manager Platform campaign wizard.
To get going, from pretty much any page select the Create Campaign button in the header.
If you are an Agency, you first select a client. If you are advertising for your own company you will not see this option.
-
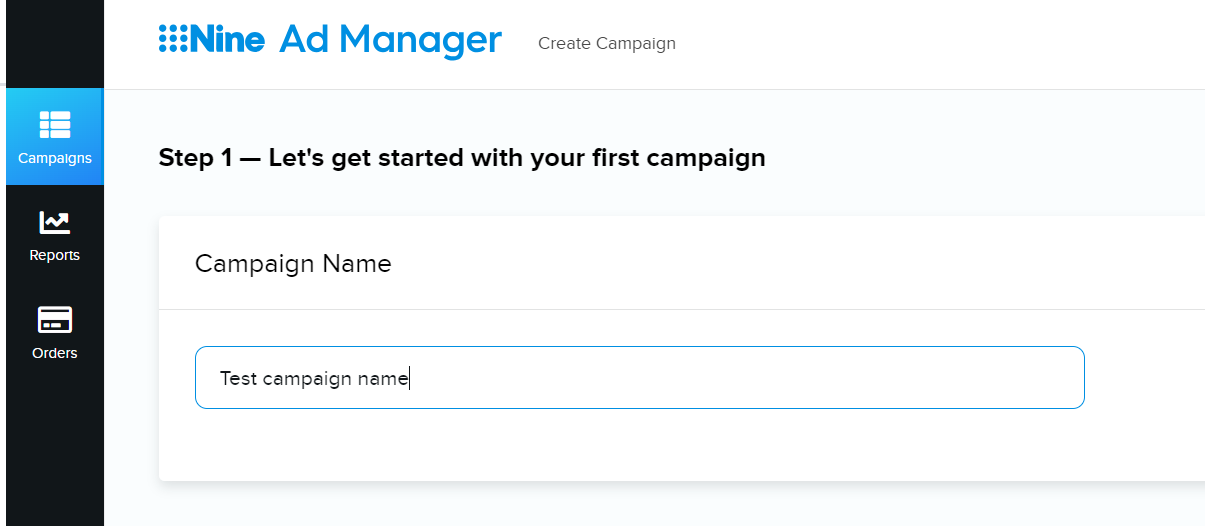
Step 1 - campaign name
The platform guides you through a couple of first steps which are pre-selected as a default. -
Campaign type is automatically selected as a video, this is how your Ad will be shown to your target customers.

-
If not already selected choose the product most relevant to you. In this case the only option is 9Now.
-
For more information you can click the information icon “i” for details.
-
To move forward in the wizard, click Next.
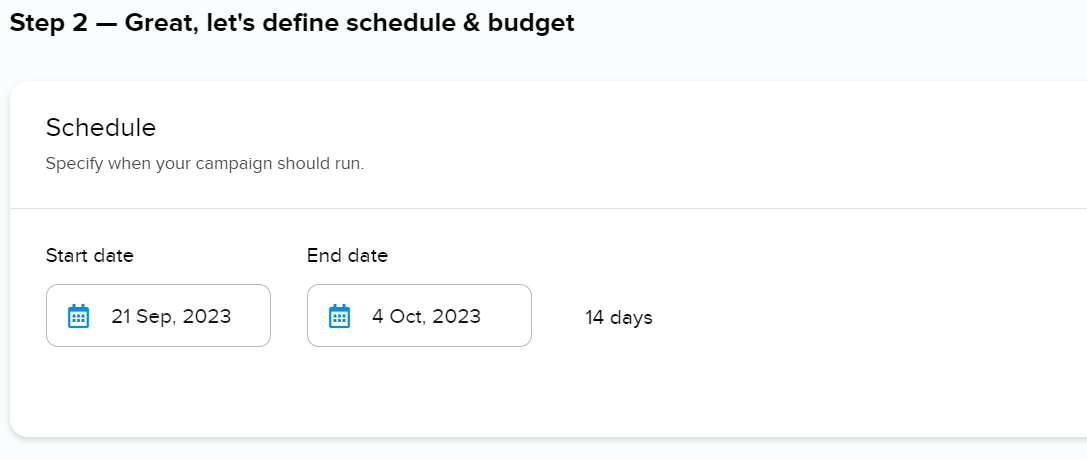
Schedule and budget
Schedule and Budget is often Step 2 in the campaign wizard.
Budget model - Pre-pay
Pre-pay means you will pay for your campaign upfront by card or by invoice.
You will set the Start and End date. The start date will be available 3 days from the current date (e.g. today’s date is 18 September 2023 the Start date will begin from 21 September 2023, this is due to our approval process)
You can always change the dates later, at least until you have checked out the campaign. After checkout you can only change the end date.
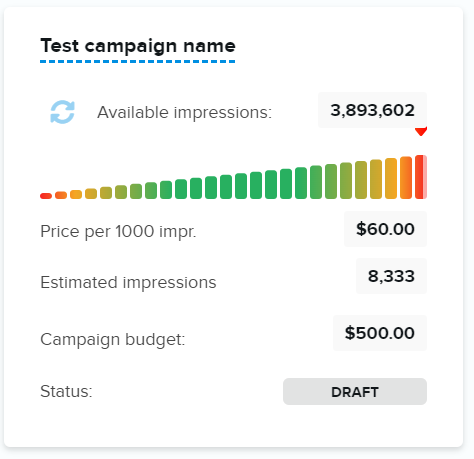
You only pay for what is delivered
For example, if you set your campaign budget to $900, you will pay $900 upfront. In case the campaign does not deliver impressions or clicks for $900, you will receive a partial refund calculated from what was delivered, this will appear 3-5 business days as a refund/credit note. You only pay for what was actually delivered.
Budget for impression based campaigns (CPM):
You can input your budget for your campaign and the estimated impressions will show and the budget per day based on your campaigns schedule and budget.

Availability
The platform is checking availability continuously. Between each step the Platform is checking if the impressions you are looking for are available. You will be notified if there is limited availability.
If availability is high this is good news for you.
You can consider increasing your budget, extending your campaign period or narrowing your targeting for a more targeted campaign.
If availability is low for you, maybe even to the point where you cannot checkout your campaign, you can always adjust your schedule, possibly lowering your budget and consider broadening your targeting.
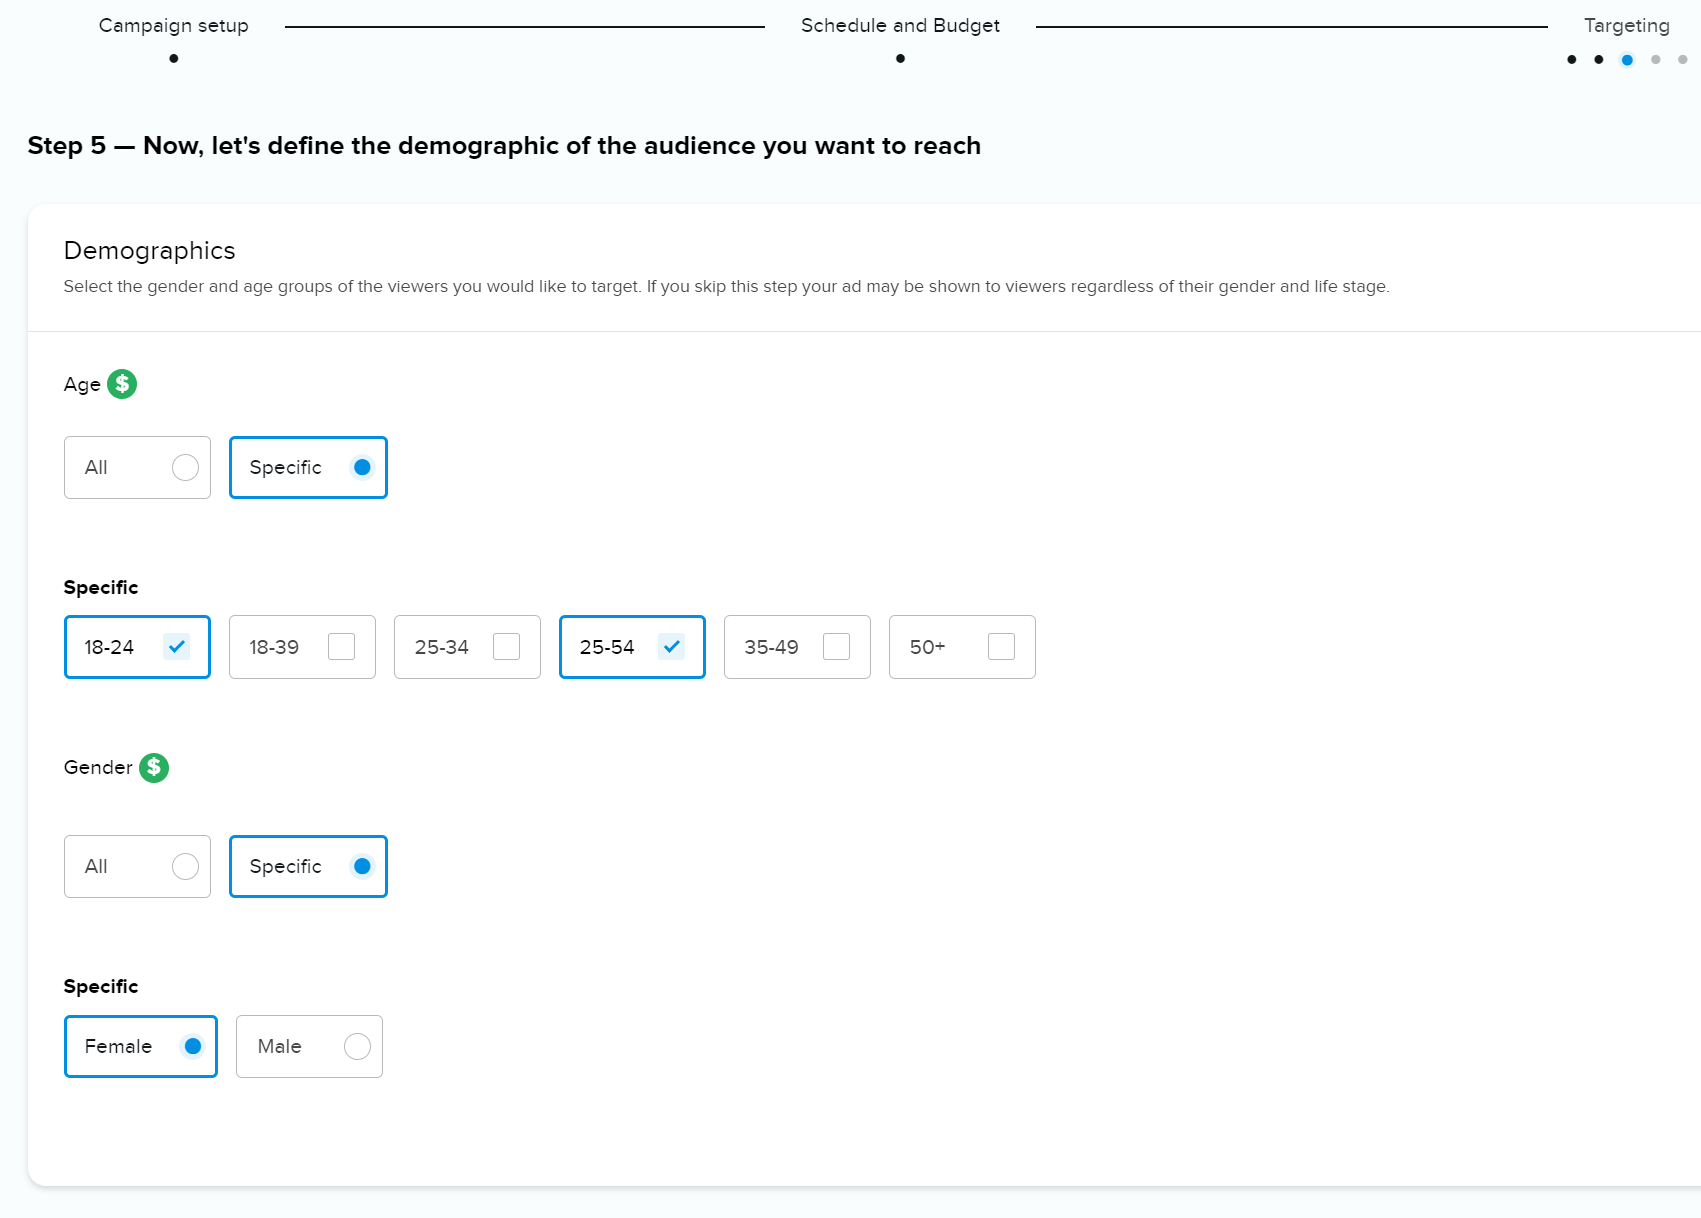
Targeting options
Next step(s) when creating your campaign is targeting. This is where you control where, when, to whom and how often your ads are shown.
For a more complete description of targeting check the Targeting section.
Add-on prices for targeting
Some targeting options might have additional costs. You can identify these by a green $-icon next to the targeting name. In this example next to Age and Gender targeting there is an add-on price symbol.
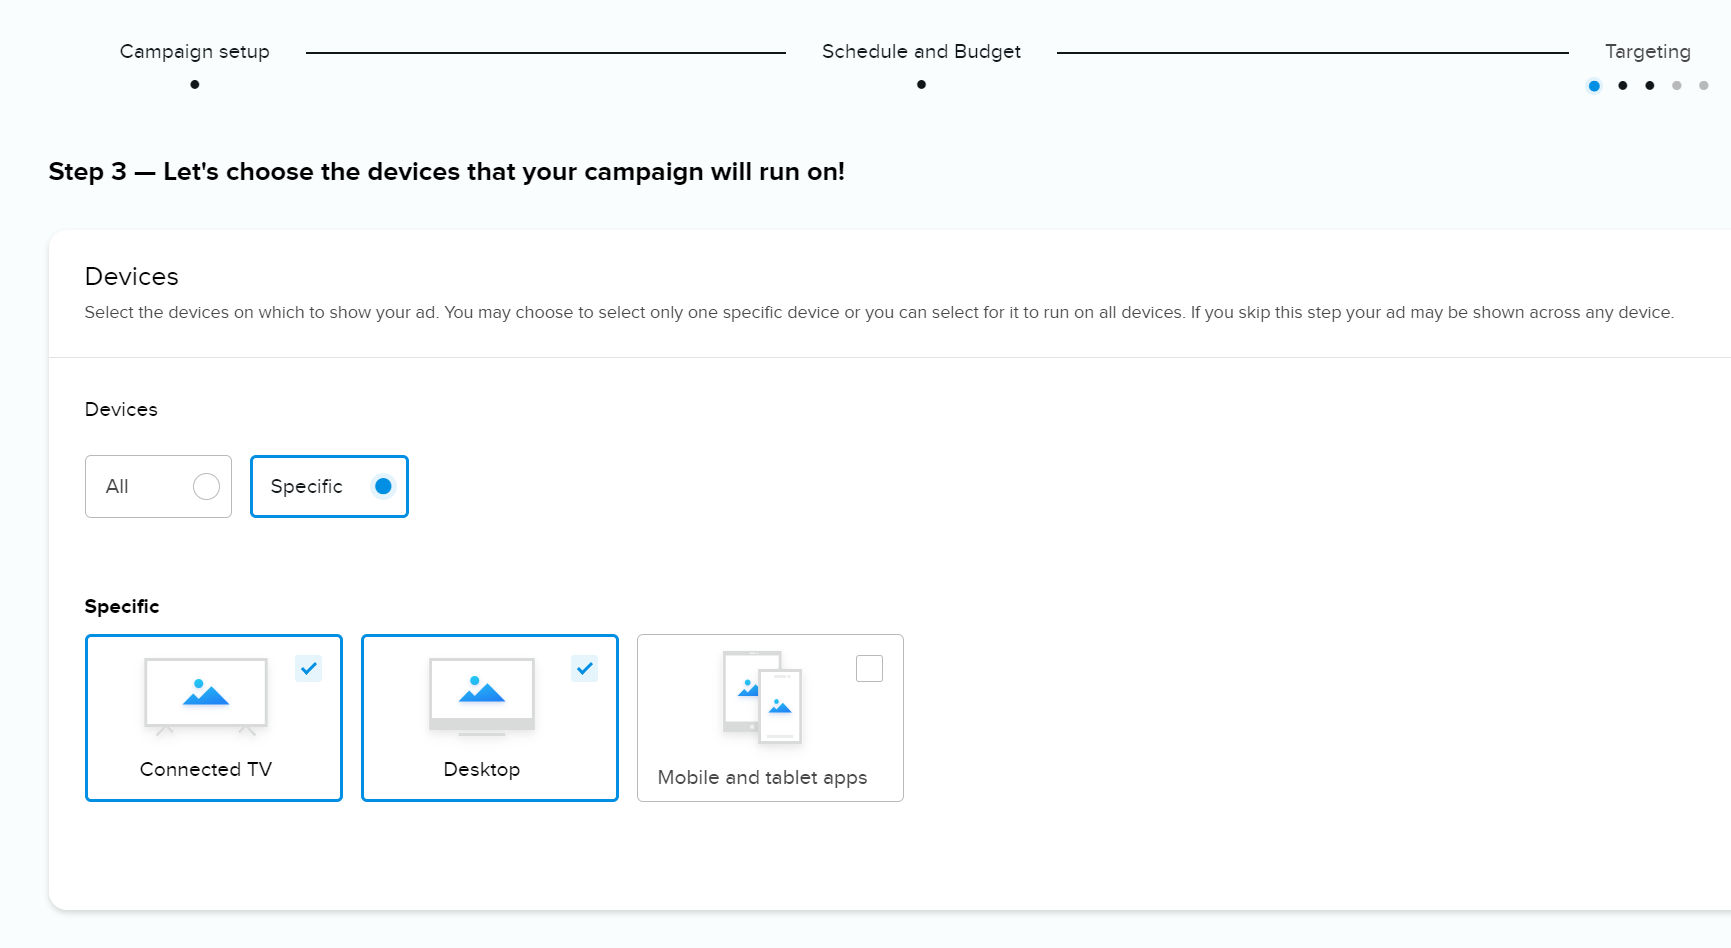
Devices
You can select All Device category or be specific and select an individual device or combination of a two.
Geography
Geography targeting is probably the most commonly used targeting method. Here you can specify if your ads should be shown only to audiences viewing your ad from specific locations. You can include or exclude certain areas from your targeting.
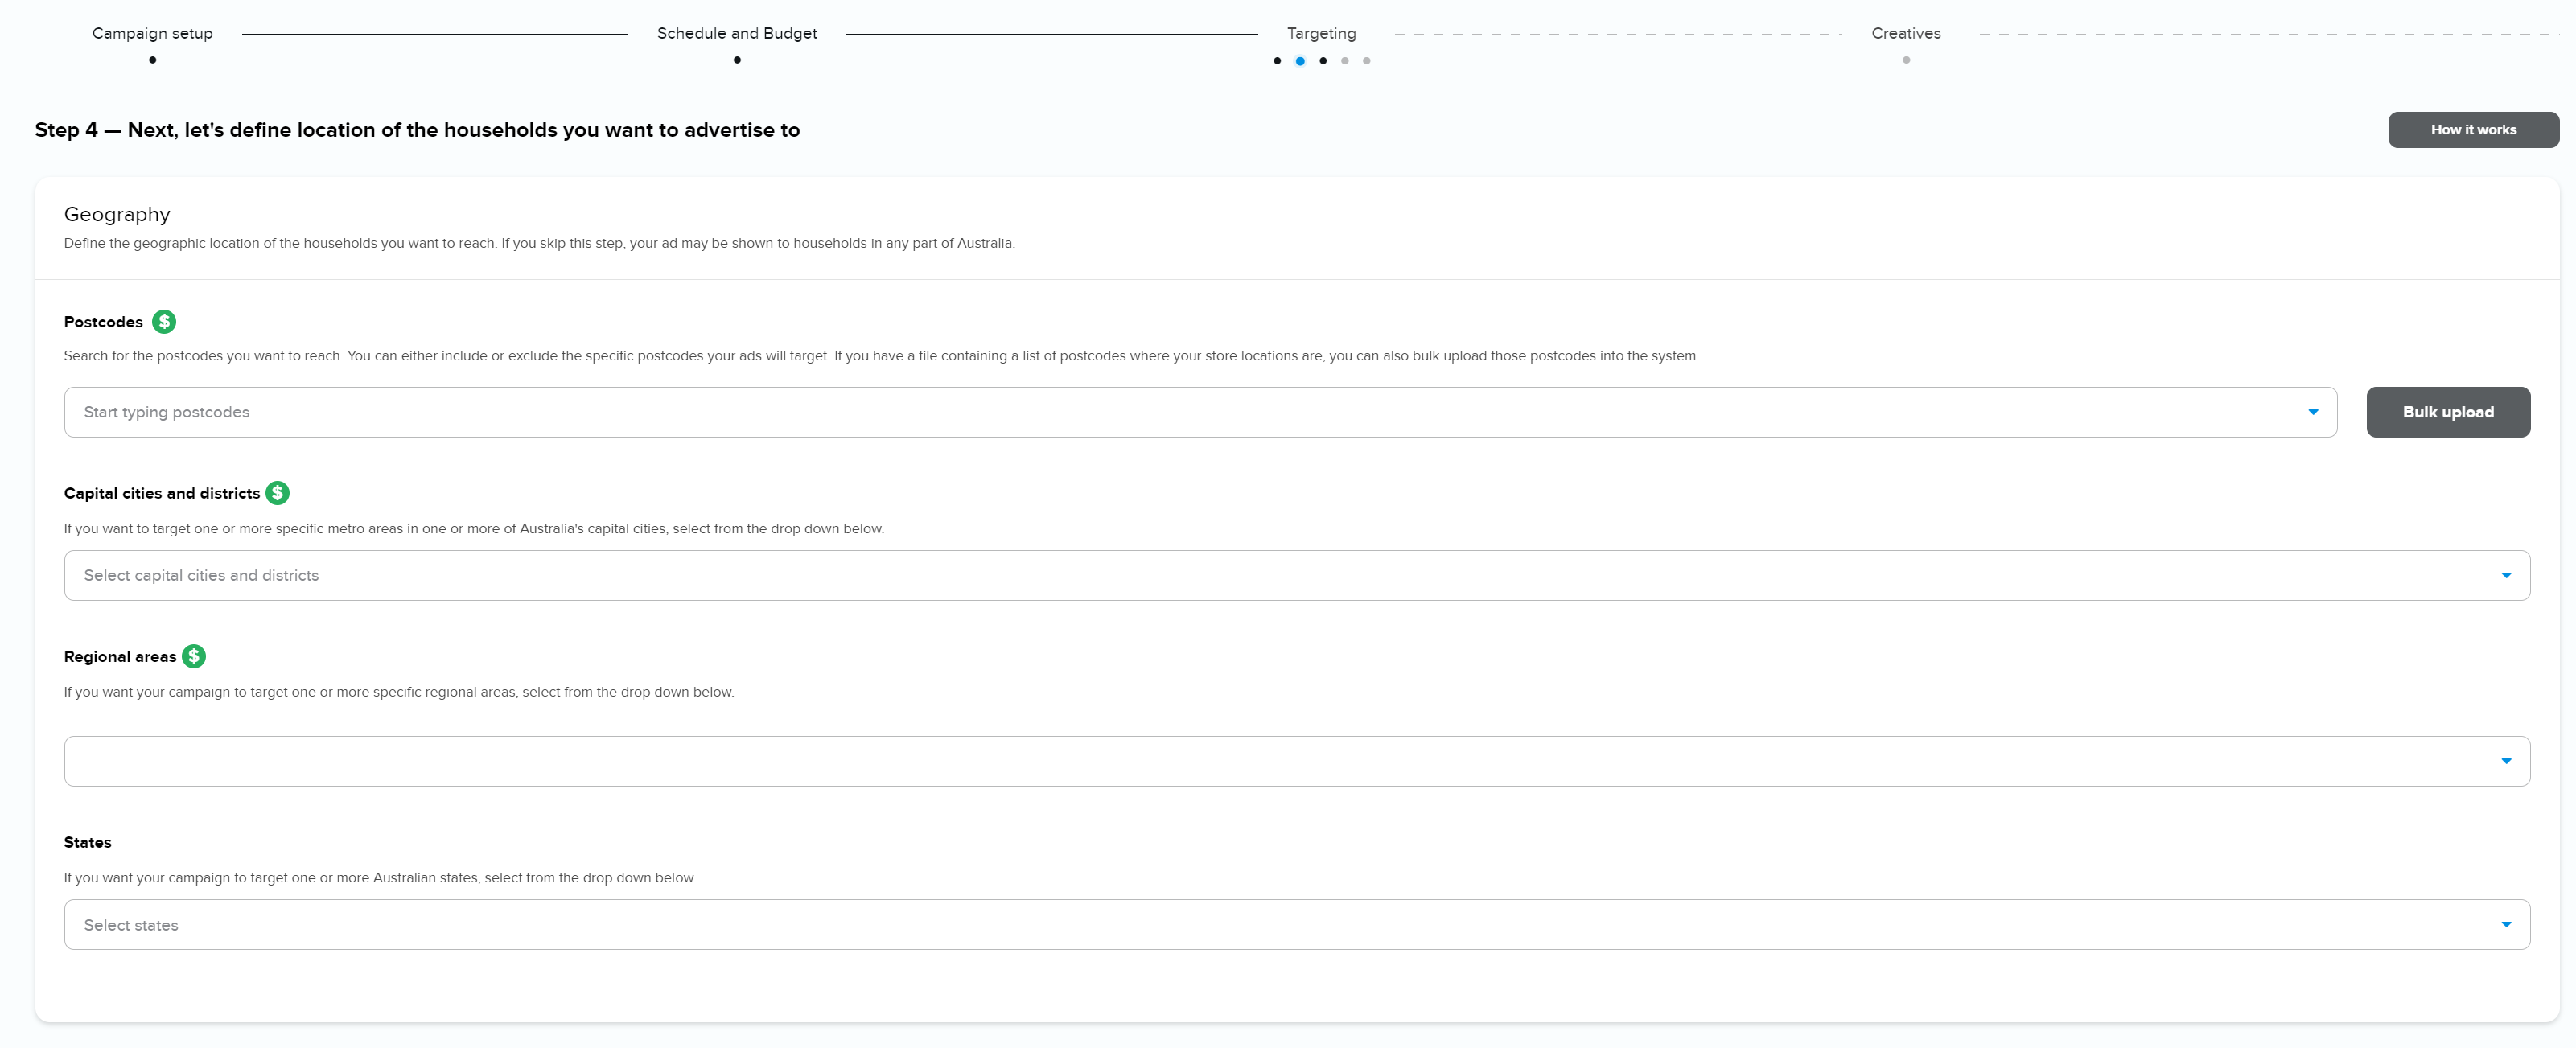
Postcodes
You can individually type in your set of postcodes of the audience you would like to target.
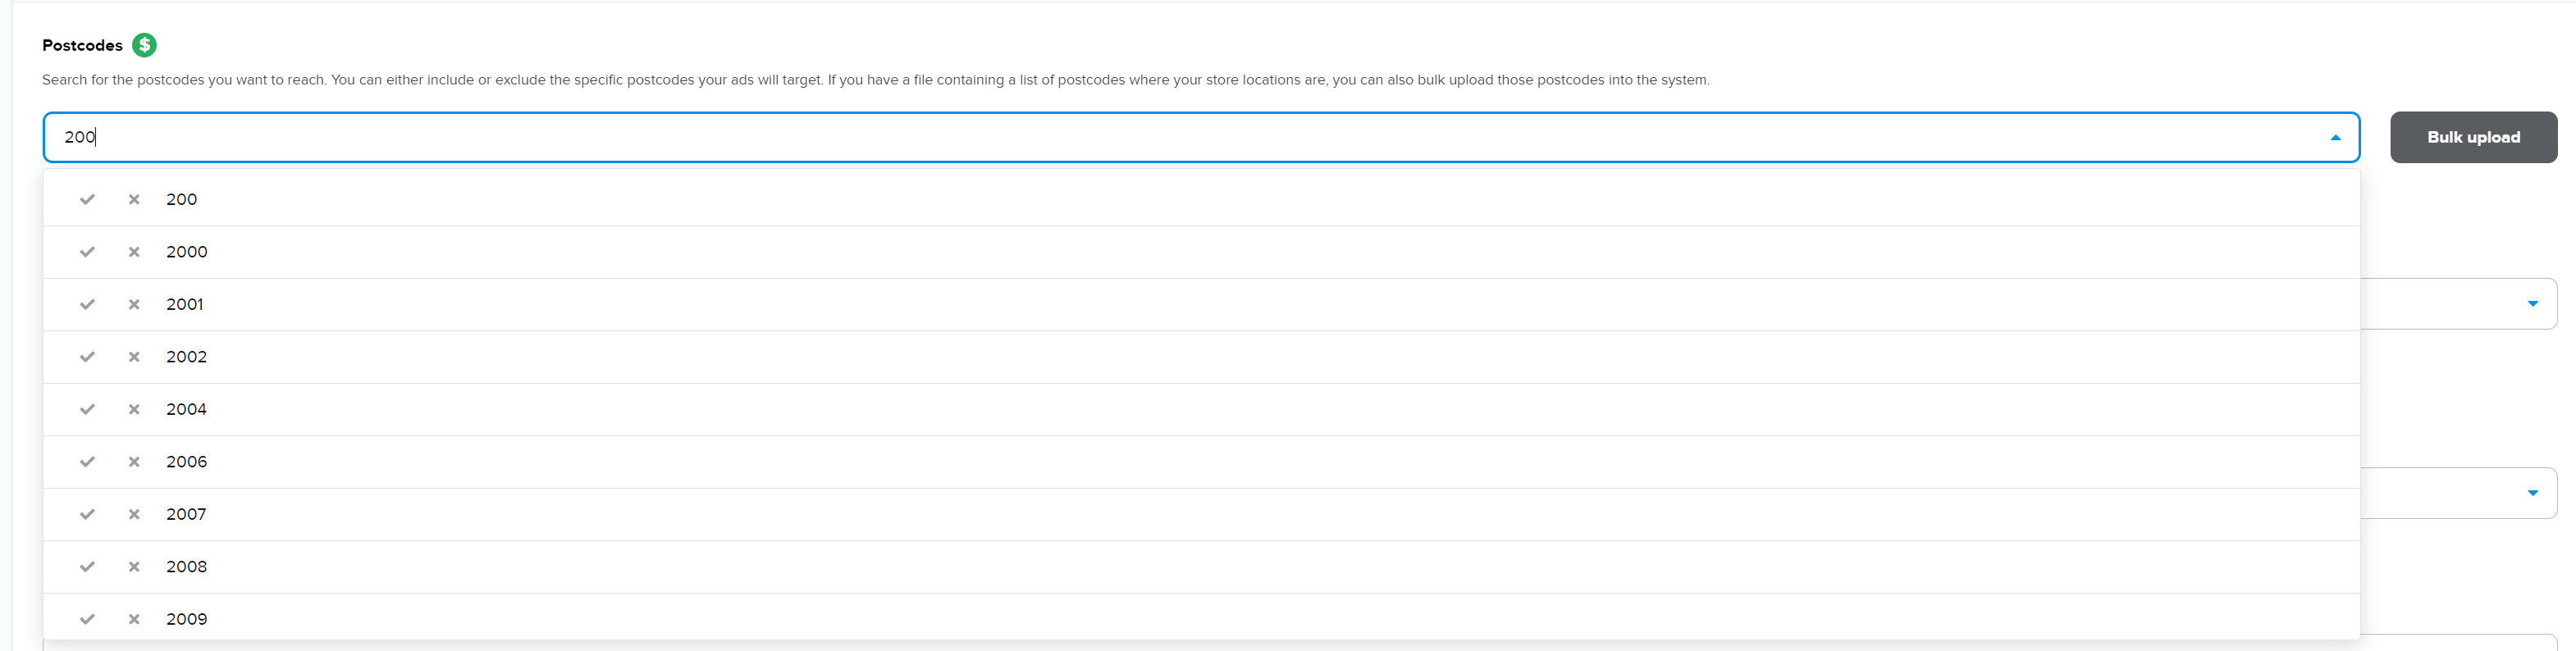
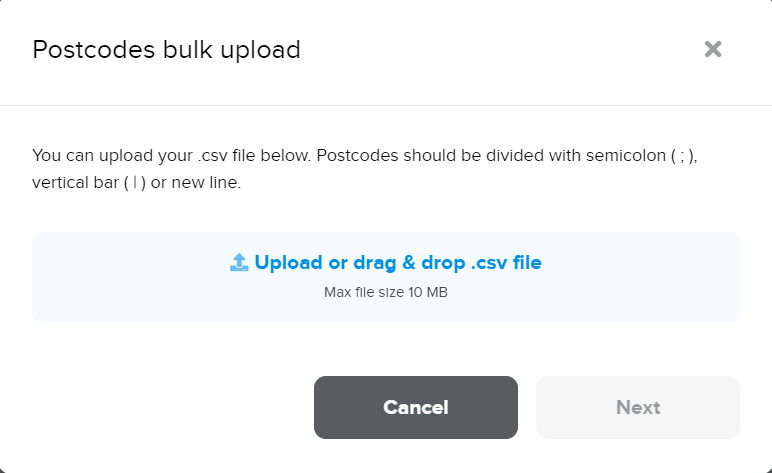
You can also select multiple postcodes from the drop down box or you can bulk upload from a CSV file.
Capital cities and districts
You can select all or multiple different combinations of capital cities and districts by clicking the area you want to target and selecting the districts from within the cities.

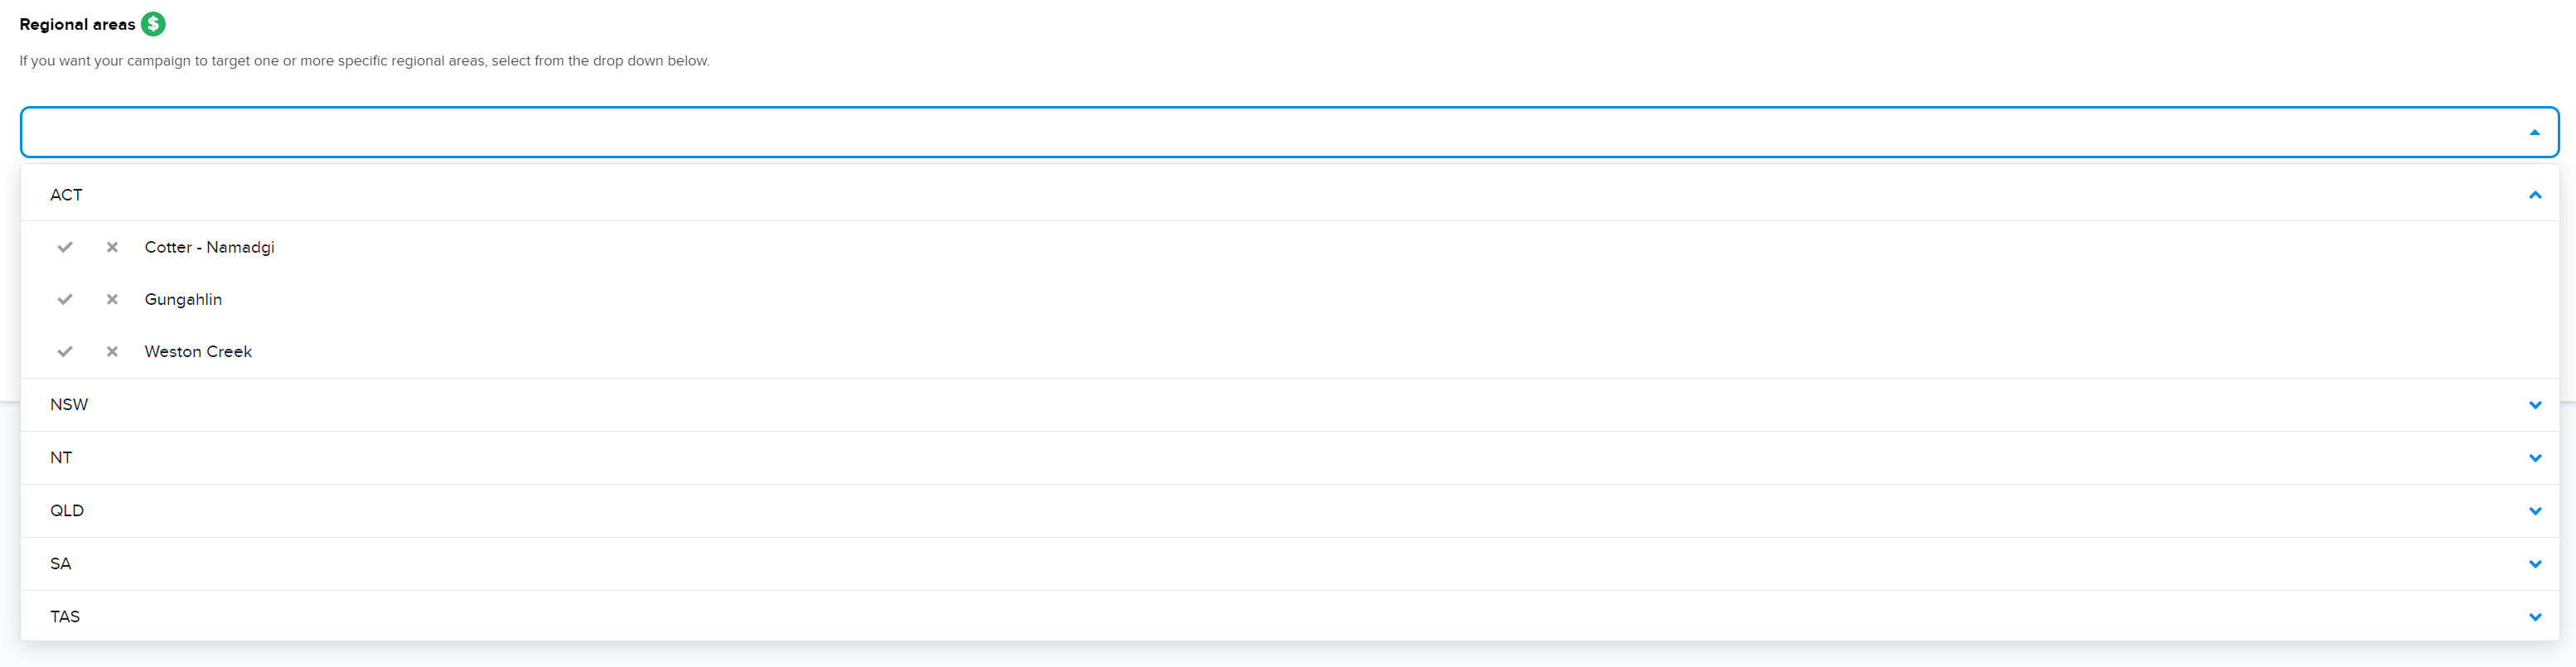
Regional areas
You can select all or pick multiple different combinations of regional areas by clicking the area you want to target and selecting the areas within the drop down box.
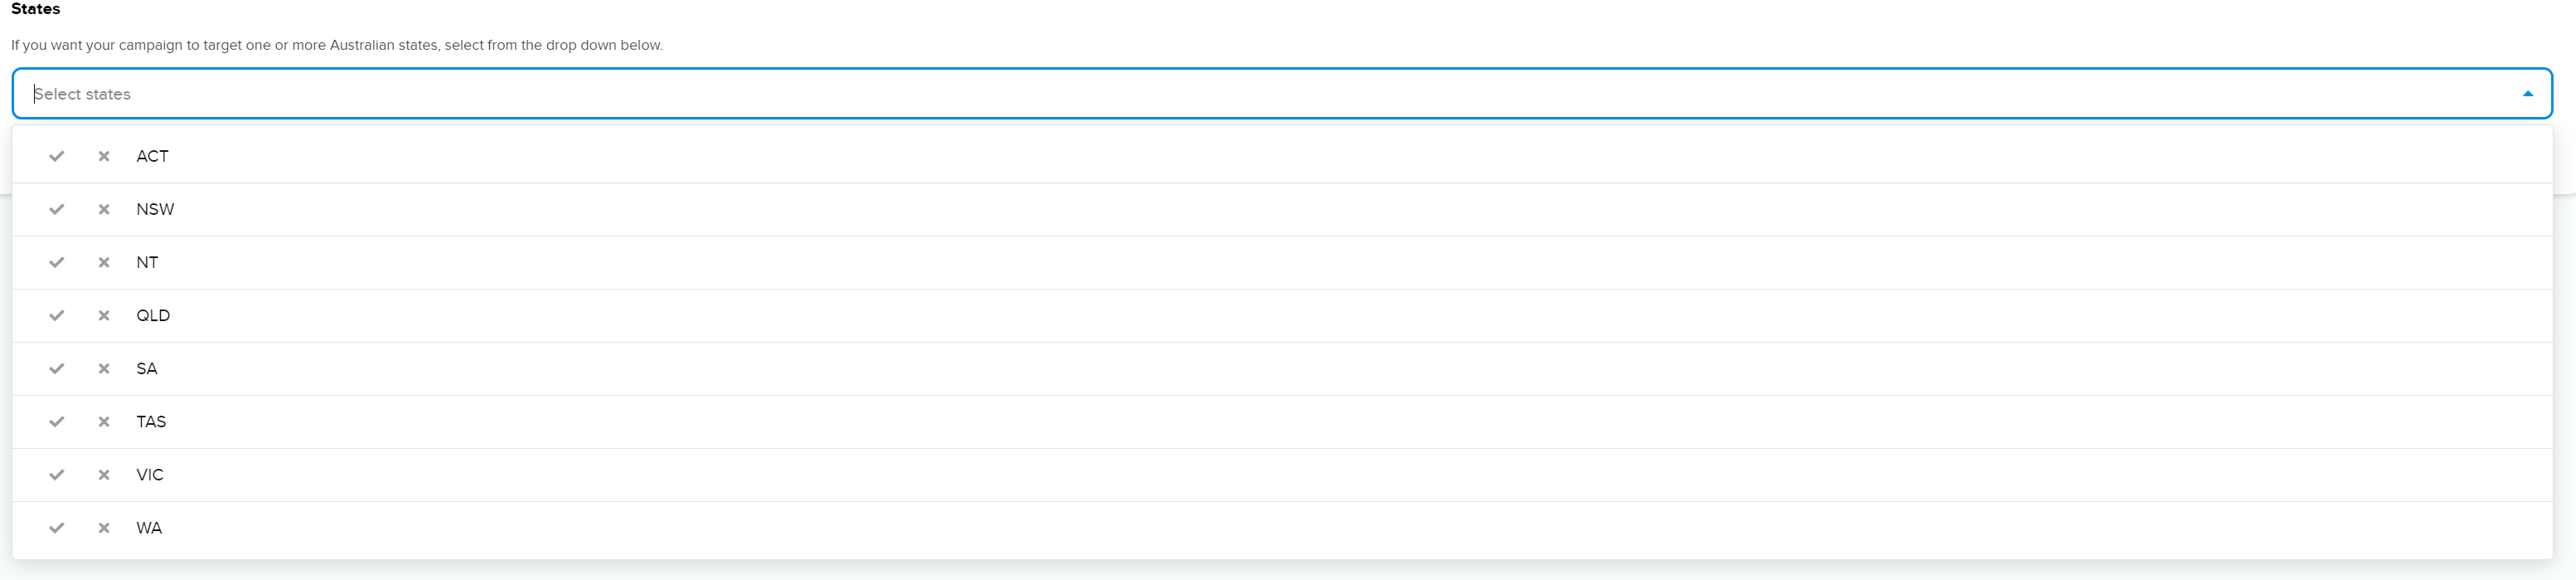
States
You can select all or pick multiple different combinations of states by clicking the state you want to target.
Age and Gender
You can set Age and Gender targeting.
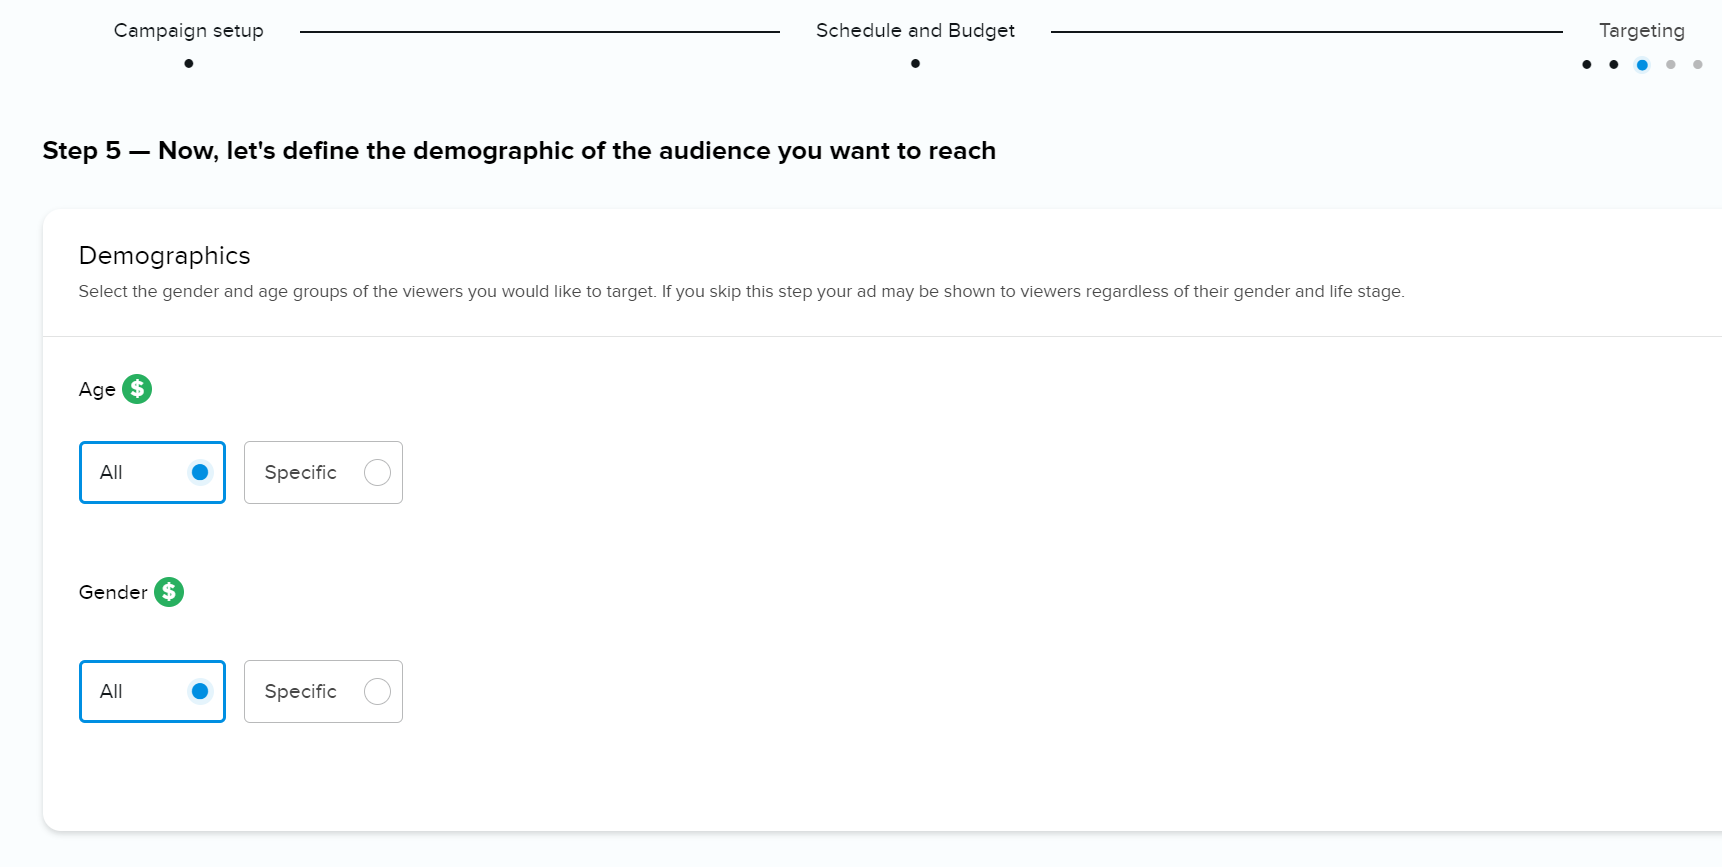
Note: Age and gender targeting limits your reach to audiences that are actually identified with age and gender. If you want to reach everyone, select All.
If you are using these targeting options, and you notice delivery of impressions is low, also consider setting these to All.
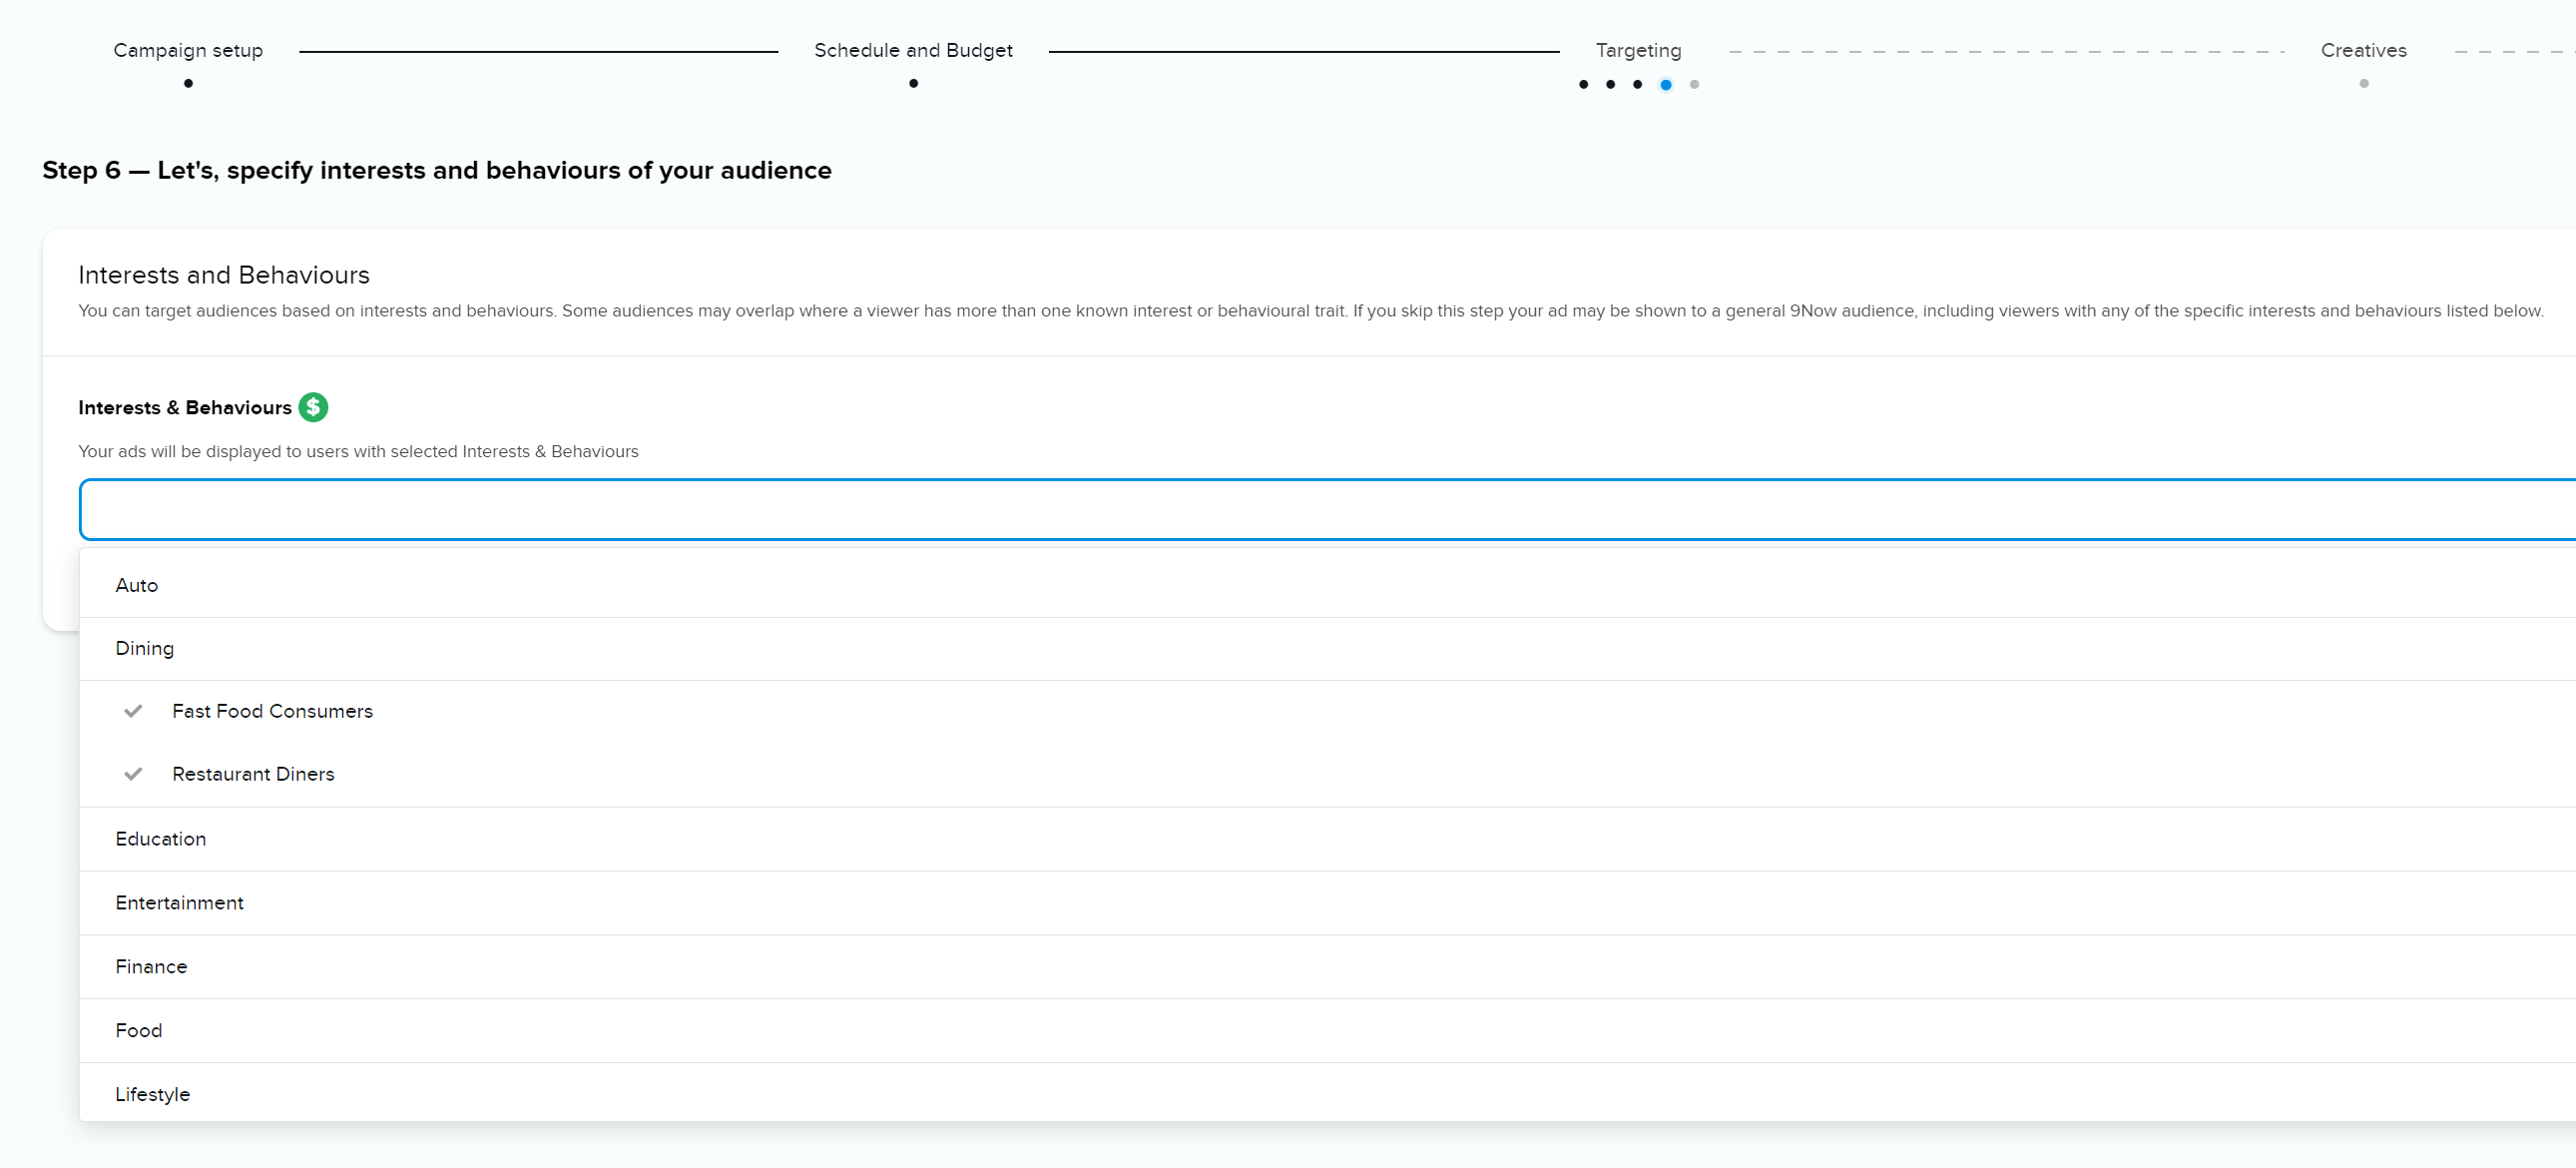
Interests and Behaviours
You can select and choose a range of interests and behaviours for you target audience by clicking on the different categories.
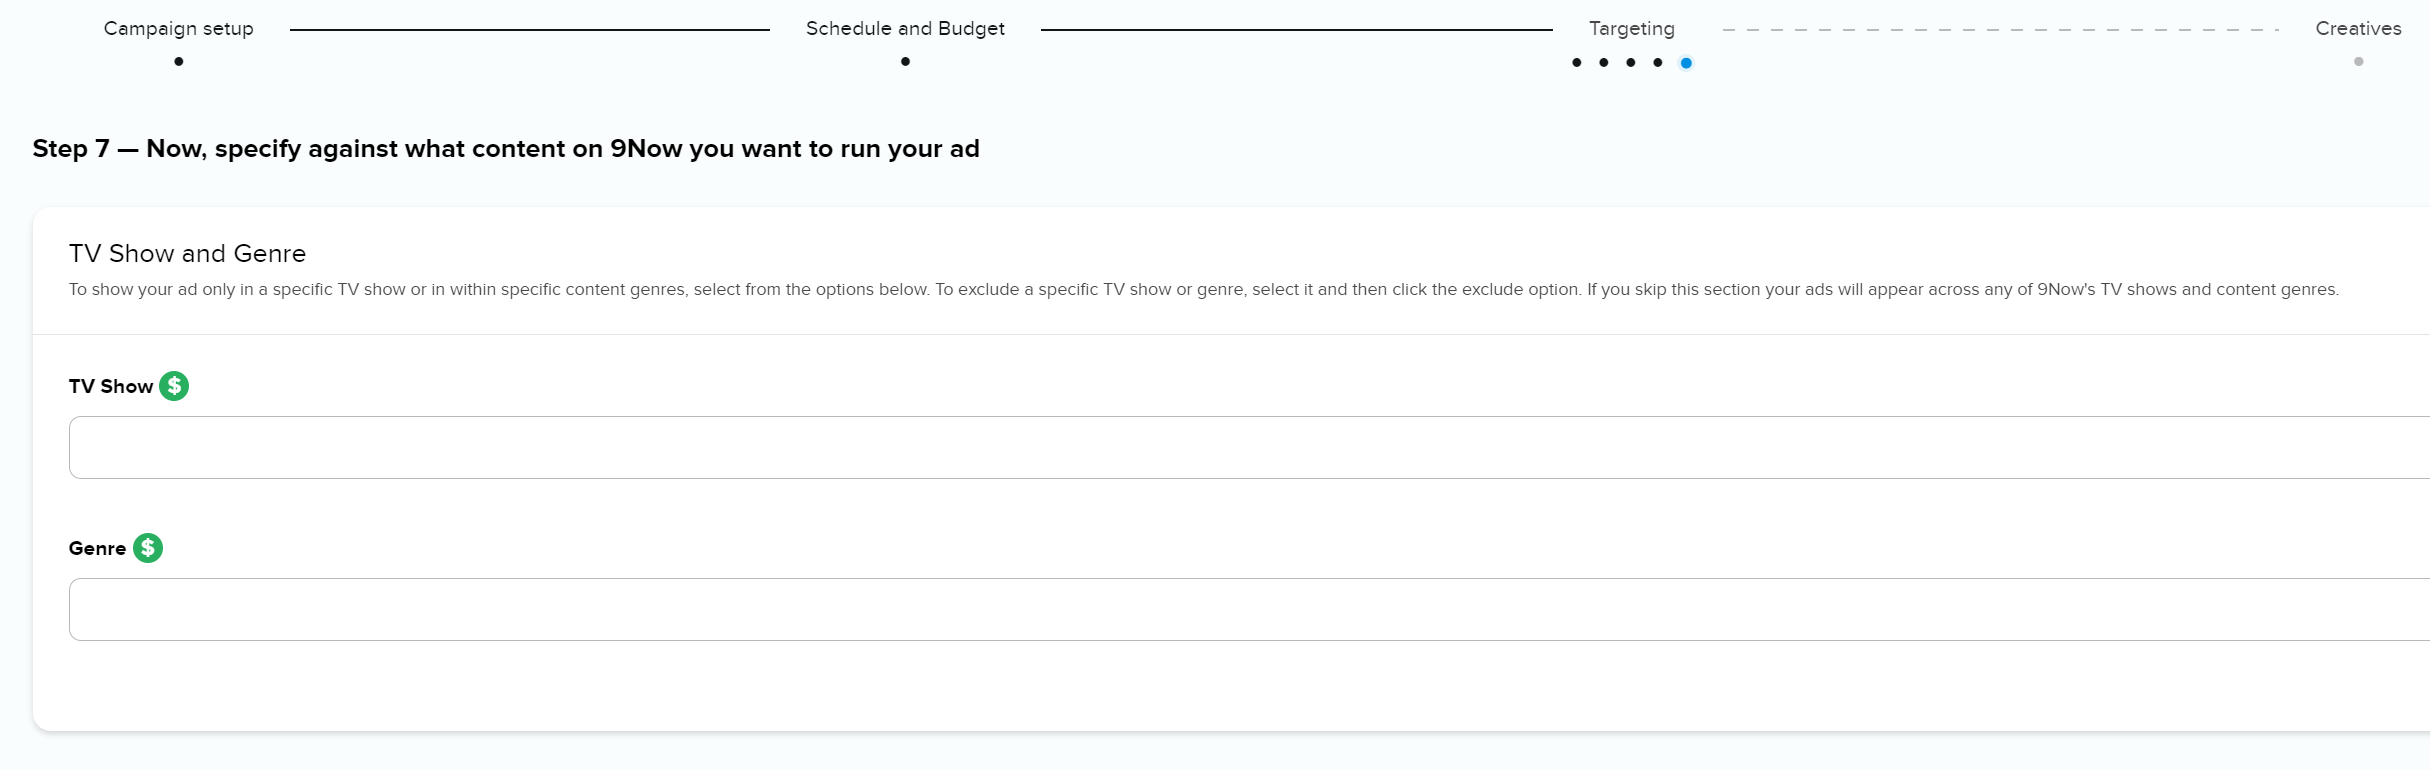
TV show and Genre
You can select from a variety of different TV shows and genres for your creative to be shown on.
Creatives
After targeting you can add you creatives. Creatives are your actual ads which will be shown to your audience.
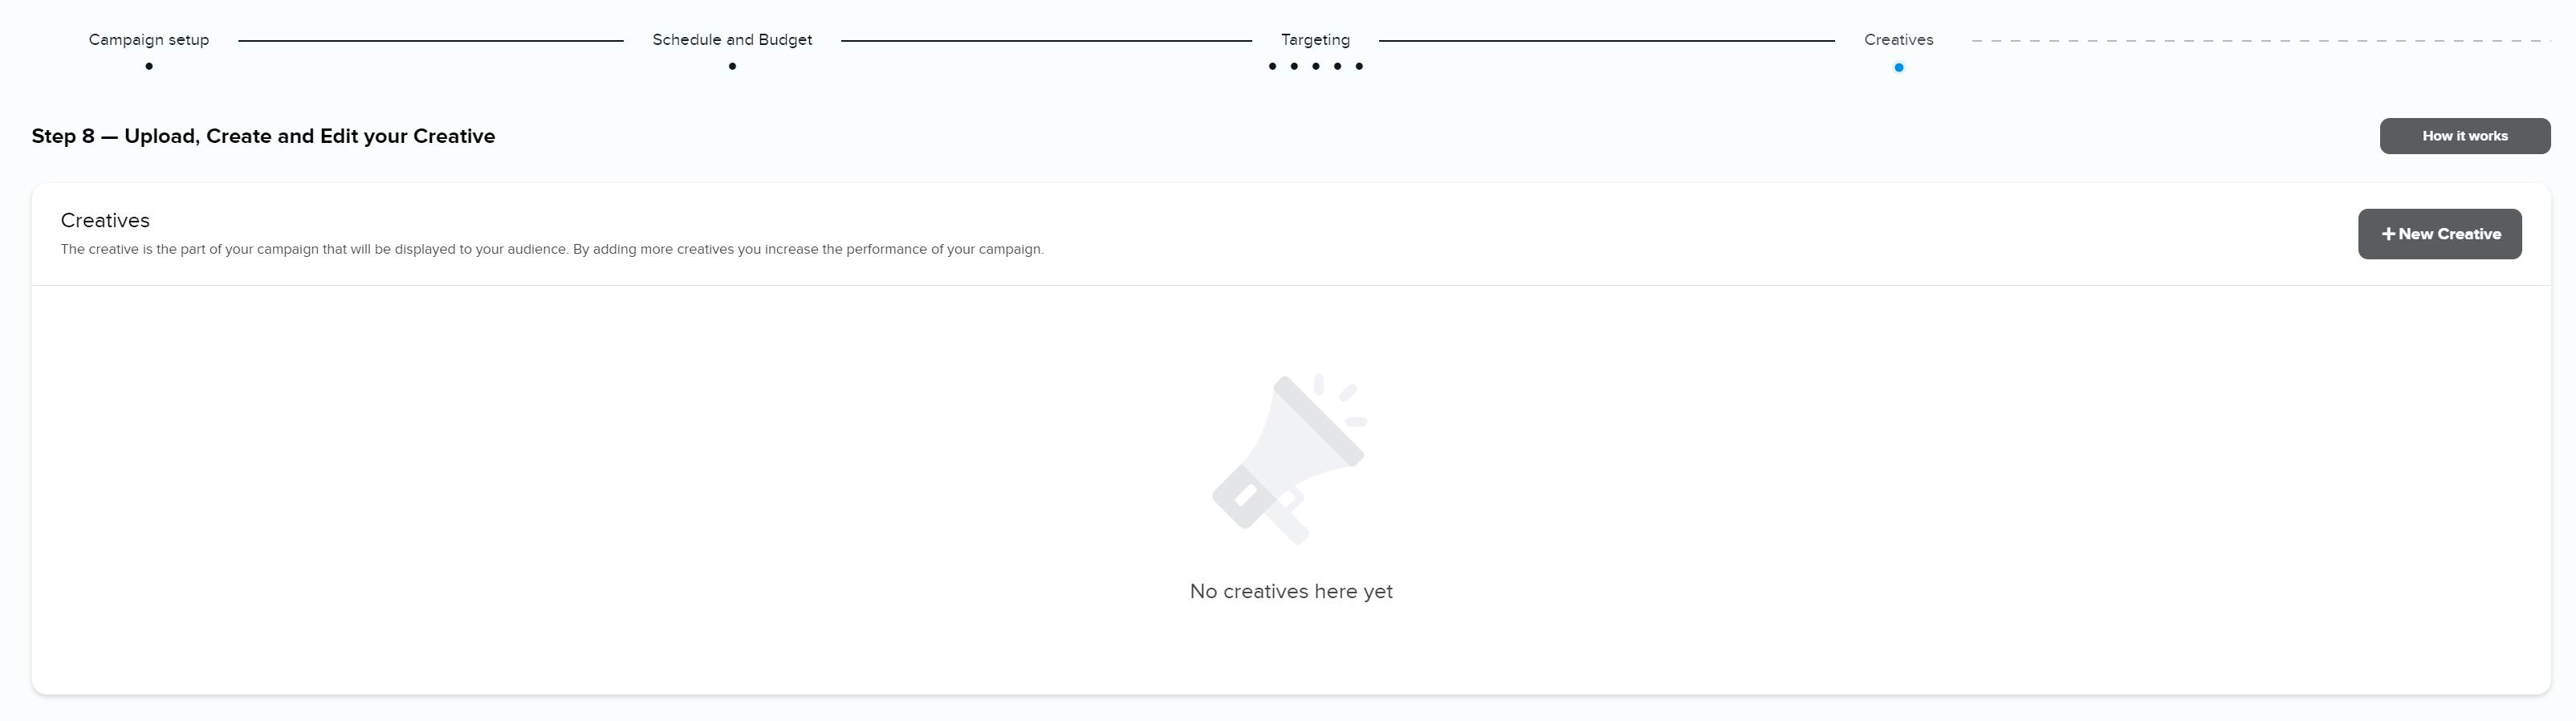
You can add a creative directly or skip this step and add creative later.
For a more complete description of creatives check the Creatives section.
Review - Final step!
Make changes to your Campaign Name if you want to rename it and review your campaign details.
When you are done you can either Save and pay later or Checkout.
Campaign status
Campaigns are stored automatically at the Budget and Targeting steps in the wizard.
New campaigns are stored as DRAFT.
After you have checked out a campaign, status changes to PENDING.
Once start date is reached and there is at least one approved creative, status changes to LIVE.
Checkout
Read all about your checkout options here.